
Pruning Plum Trees: Expert Tips for a Bountiful Harvest
- Swift Trees Perth

- Oct 5, 2025
- 18 min read
Pruning your plum tree isn't just a quick tidy-up—it's one of the most important things you'll do for its health and the fruit it produces. Think of it as a strategic conversation with your tree. You’re guiding it towards a long, productive life by opening up the canopy to sunlight, improving airflow to keep diseases at bay, and encouraging strong, fruit-bearing branches to form. A well-pruned plum tree is a fashionable statement in any modern garden, showcasing a commitment to both aesthetics and productivity.
Why Pruning Plum Trees Is Essential for a Great Harvest
A lot of gardeners feel a bit nervous about pruning, worried they might cut too much and harm the tree. But trust me, leaving it alone is far worse. An unpruned plum tree quickly becomes a tangled mess of weak, unproductive wood that struggles to produce decent fruit and is an open invitation for pests and diseases.
Proper, strategic pruning is the single best thing you can do to get a healthy tree and a fantastic harvest year after year.
The main goal is to create an open, balanced shape. This isn't just about looks; it’s all about function. When you remove crowded, crossing, and weak branches, you let sunlight penetrate deep into the canopy. That sunlight is what ripens your plums, giving them that beautiful deep colour and sweet, juicy flavour. For instance, a dense canopy on a 'Black Doris' plum might result in fruit that's red instead of a deep purple, and lacking in sweetness, simply because the sun couldn't reach it.
Boosting Fruit Yield and Quality
A well-pruned tree knows exactly where to put its energy. Instead of wasting resources on too many leaves or useless branches, it sends everything into developing strong fruiting wood and, ultimately, bigger, better-tasting plums. You'll see a real difference in both the size of your harvest and the quality of the fruit.
Better air circulation is another massive win. A dense, overgrown canopy traps moisture, creating the perfect damp conditions for fungal diseases like brown rot, which can completely ruin a plum crop. Thinning out the branches allows air to move freely, drying the leaves and fruit quickly after rain and drastically reducing the chance of disease taking hold.
Here's a quick look at the core benefits you're aiming for:
| Core Benefits of Strategic Plum Tree Pruning || :--- | :--- || Benefit | Impact on Your Plum Tree || Increased Fruit Production | Directs the tree's energy into developing more, larger, and higher-quality plums. || Improved Tree Health | Enhances sunlight exposure and air circulation, significantly reducing the risk of fungal diseases. || Stronger Structure | Develops a robust framework that can support a heavy crop without branches breaking. || Enhanced Longevity | Removes weak, dead, or diseased wood, promoting vigorous growth and extending the tree's life. || Easier Management | Keeps the tree at a manageable size for easier harvesting, spraying, and ongoing care. |
Ultimately, a well-pruned tree is a healthier, more resilient, and more productive tree.
Shaping for Strength and Longevity
In Australian gardens and orchards, how we prune has a direct impact on the tree's vigour and yield. A popular and effective method, especially for home gardens, is the 'central leader' system. This involves encouraging one main trunk to grow straight up, with a framework of lateral branches growing off it.
This structure is fantastic for popular dwarf varieties like 'Santa Rosa' and 'Mariposa', which typically grow to about 2.5 metres. It keeps them compact and makes them much easier to manage in a smaller backyard. You can learn more about these professional orchard management insights from Australian growers to see how the pros approach it.
Being proactive with your pruning is the best defence you have against common plum tree problems. By creating a strong structure and removing weak points early on, you prevent branches from snapping under the weight of a heavy crop and give your tree the best chance of withstanding storm damage.
At the end of the day, pruning is an investment in your tree's future. It's a skill that blends a bit of horticultural science with a touch of artistry, but the rewards—buckets of juicy, homegrown plums—are absolutely worth the effort.
Feeling unsure about where to start with your plum trees? The expert team at Swift Trees Perth has the knowledge and experience to handle all your tree maintenance needs, ensuring your trees are healthy, safe, and productive. Contact us today for a free, honest quote.
The Best Time to Prune Plums in Australia
In the world of gardening, timing really is everything. This couldn't be more true than when you’re standing in front of a plum tree, secateurs in hand. Making your cuts at the right time of year sets the stage for a healthy tree and a bumper harvest. Get it wrong, and you might invite disease or, even worse, sacrifice your precious fruit.
Across Australia, your calendar is the best tool you have for this job. The main, structural pruning absolutely must happen when the tree is dormant. Think of it as the tree's long winter nap—a period of rest where growth has stopped, and the sap has retreated. Pruning during dormancy minimises stress, allowing the tree to heal its wounds efficiently before the explosive growth of spring kicks in.
For most of Australia, this means the ideal window for the major work of pruning plum trees is during the winter months, from June through to August.
The Prime Winter Pruning Window
Winter pruning is all about shaping the tree's core structure for the long term. This is when you’ll make your biggest cuts—getting rid of large, dead, or poorly placed branches to create that ideal open, vase-like shape. With the branches bare, you get a crystal-clear view of the entire framework, making it much easier to see what needs to go.
But there’s an even more critical reason for this timing: disease prevention. Every pruning cut creates a wound, and during the warmer, wetter months, these wounds are open invitations for fungal and bacterial nasties. The biggest threat to plum trees is silver leaf disease, a devastating fungus that enters through pruning cuts and can be fatal.
Winter pruning is your best defence against silver leaf. The fungal spores are far less active in the cold, dry air of winter, giving your tree’s wounds a head start on healing before the risk ramps up with spring humidity.
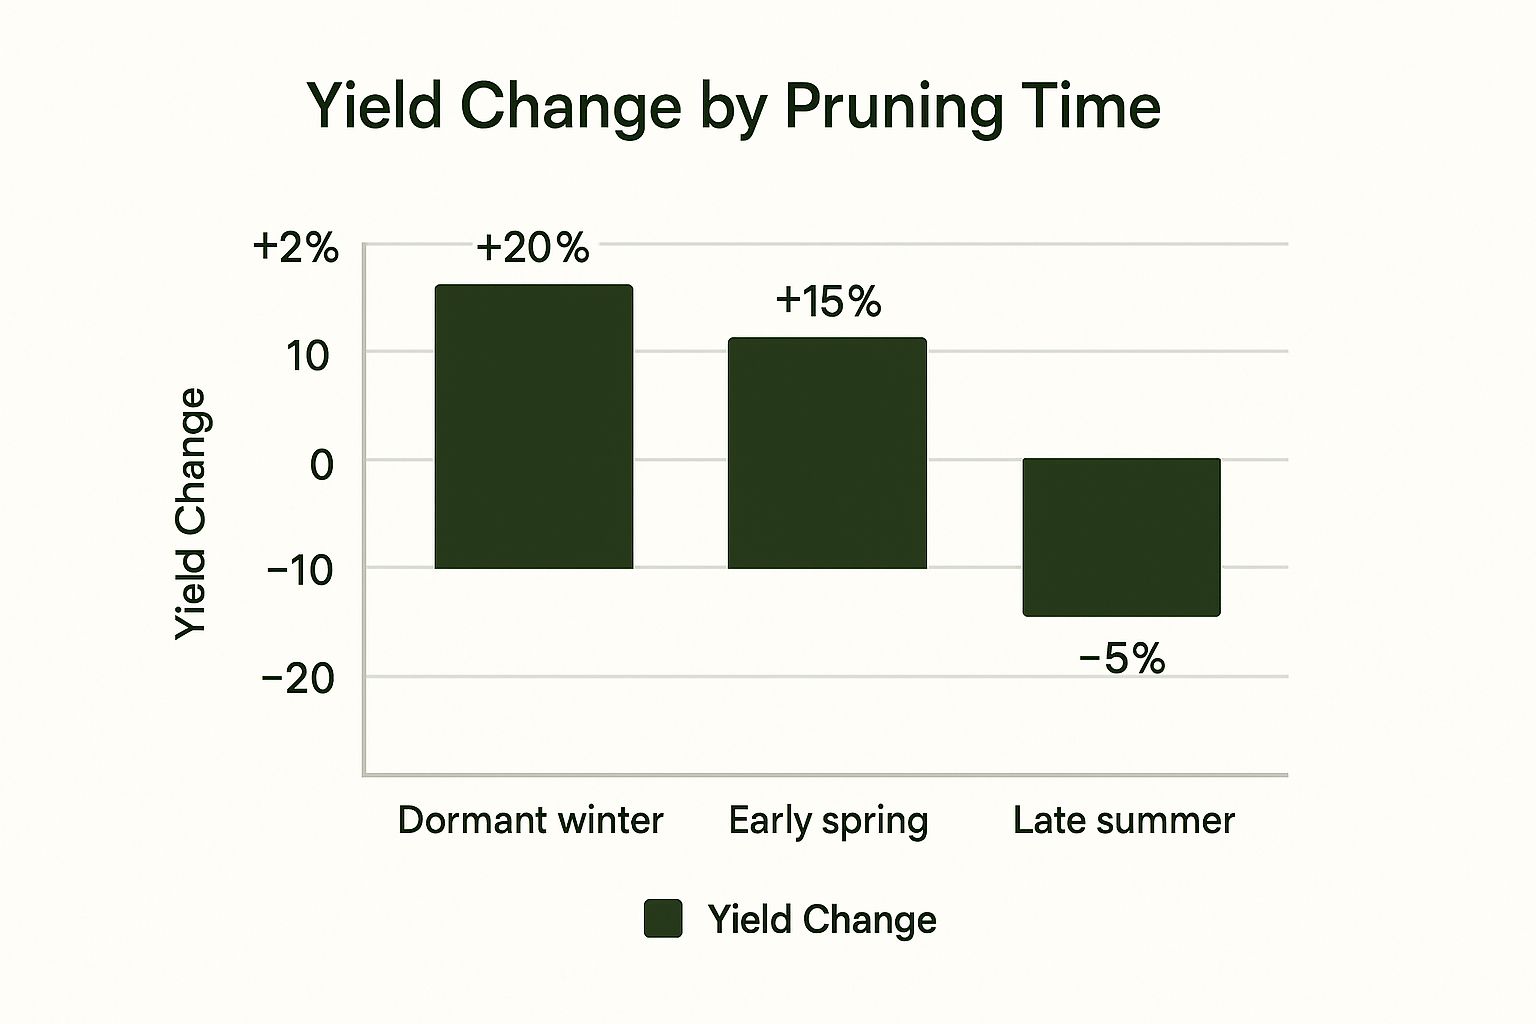
As you can see, timing your prune correctly during winter dormancy can make a massive difference to your fruit yield. The data shows that while an early spring prune is better than nothing, a proper dormant winter prune is the key to boosting your harvest.
Finding the Sweet Spot
While the entire June-to-August period is generally fine, many experienced gardeners aim for a specific 'sweet spot' in late winter, around early to mid-August. Pruning at this time still takes full advantage of the tree's dormancy but is close enough to spring that the healing process kicks into high gear almost immediately as the sap starts to rise. It's a great way to stimulate vigorous new growth as soon as the weather warms up.
A good rule of thumb in Australia is to get your main prune done between June 1st and August 31st. Cutting from September onwards is a real gamble, as it coincides with a much higher risk period for silver leaf and other infections that thrive in damp spring conditions. For more specific local advice, check out our comprehensive guide on when to prune fruit trees in Perth.
What About Summer Pruning?
So, winter is for structure, but that doesn’t mean summer is a no-go zone. A light summer prune, typically done in December or January, is all about maintenance and improving the fruit you’ll be picking soon. This contemporary approach, favoured in modern edible gardens, focuses on quality over quantity.
This isn’t a heavy-duty session. Instead, you'll be focusing on a few key tasks:
Removing Water Sprouts: These are the fast-growing, vertical shoots that pop up on main branches. They're non-productive and just steal energy from the tree, so whipping them off redirects that energy back into the fruit. A practical example would be snapping off the soft, green shoots by hand when they are under 15cm long.
Improving Sun Exposure: Thinning out some of the dense, leafy growth allows more sunlight to reach the developing plums. This is vital for proper ripening and developing that deep, sweet flavour we all love.
Controlling Size: If you've got a particularly vigorous tree, a light trim in summer can help keep its size in check without stimulating the aggressive regrowth you’d get from a winter prune.
Think of summer pruning as a gentle tidy-up, complementing the major structural work you’ve already done.
To help you keep track, here's a quick breakdown of the different seasonal goals for pruning your plum trees in Australia.
Seasonal Pruning Guide for Australian Plum Trees
Season | Primary Goal | Typical Actions | Key Considerations |
|---|---|---|---|
Winter (June-August) | Structural Development | Removing dead, diseased, or crossing branches. Shaping the tree for airflow and sun. | The best time for major cuts to minimise disease risk and encourage strong spring growth. |
Summer (Dec-Jan) | Fruit Quality & Maintenance | Removing water sprouts. Thinning canopy for sun penetration. Controlling vigorous growth. | Light pruning only. Focus on improving current season's fruit and managing tree size. |
This two-step seasonal approach is the secret many keen gardeners use to get the best possible results from their plum trees, year after year.
If you’re facing a particularly overgrown tree or feel uncertain about making the right cuts, don’t hesitate to call in the professionals. For expert tree maintenance tailored to Perth’s unique conditions, contact Swift Trees Perth for an obligation-free quote and ensure your plum tree is pruned for perfect health and production.
Choosing the Right Pruning Tools
Heading out to prune your plum tree with the wrong equipment is a recipe for disaster. It’s like trying to cook a gourmet meal with a plastic spoon – you might get the job done, but the results won’t be pretty, and you’ll likely do more harm than good.
When it comes to the art of pruning, your tools are just as crucial as your technique. Blunt or poor-quality gear can crush stems instead of cutting them cleanly. This creates ragged wounds that heal slowly and practically invite disease. Investing in a solid toolkit isn't just about making the job easier for you; it's a fundamental part of responsible tree care.
Your Core Pruning Arsenal
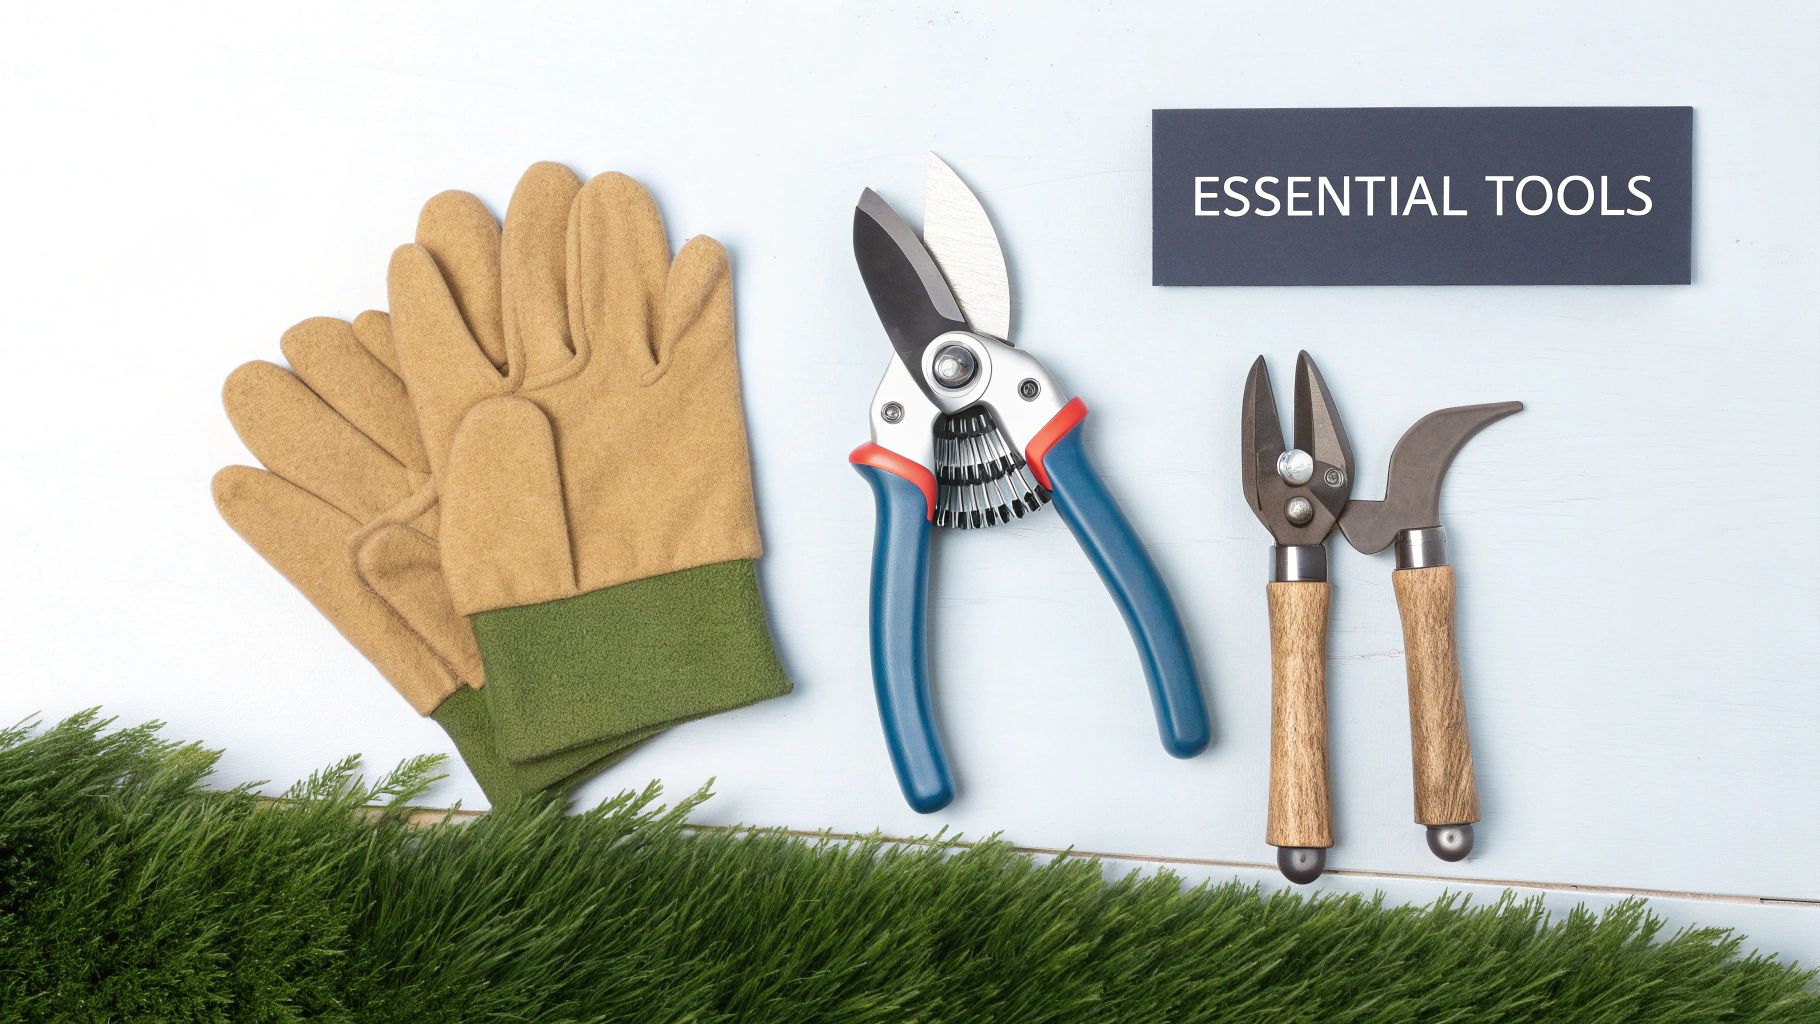
You don't need a whole shed full of gadgets. In reality, just three essential tools will handle almost anything your plum tree can throw at you.
Bypass Secateurs: This is your workhorse. Bypass secateurs work just like scissors, with two sharp blades passing each other to make a clean, precise cut. They're perfect for the smaller branches you'll be dealing with most often, up to about 2 cm in diameter.
Loppers: Think of these as long-handled secateurs. Loppers give you the extra leverage needed for thicker branches, typically between 2 cm and 5 cm. Their long arms also help you reach a bit higher into the canopy without needing a ladder.
Pruning Saw: For any branch thicker than your wrist, you’ll need a pruning saw. These are designed to cut on the pull stroke, which gives you more control and stops the blade from jamming or buckling. A curved blade is especially handy for getting into those awkward angles inside the tree.
Here’s a practical tip from experience: invest in a decent holster for your secateurs. It keeps your most-used tool safely at your hip, saving you from misplacing it or, worse, dangerously stuffing it into a pocket.
The Unbreakable Rule of Tool Hygiene
If you take only one piece of advice from this section, make it this one: clean and sterilise your tools. This is, without a doubt, the most critical step in preventing the spread of diseases from one branch—or one tree—to another. Fungal spores and bacteria are invisible hitchhikers that love travelling on dirty blades.
Making a cut with a dirty tool is like a surgeon operating with an unsterilised scalpel. You risk introducing a serious infection directly into the tree's most vulnerable point—an open wound.
Before you start, and especially when moving between different trees, just take a moment to wipe the blades with a cloth soaked in methylated spirits or a diluted bleach solution (one part bleach to nine parts water). It’s a quick step that could genuinely save your tree's life.
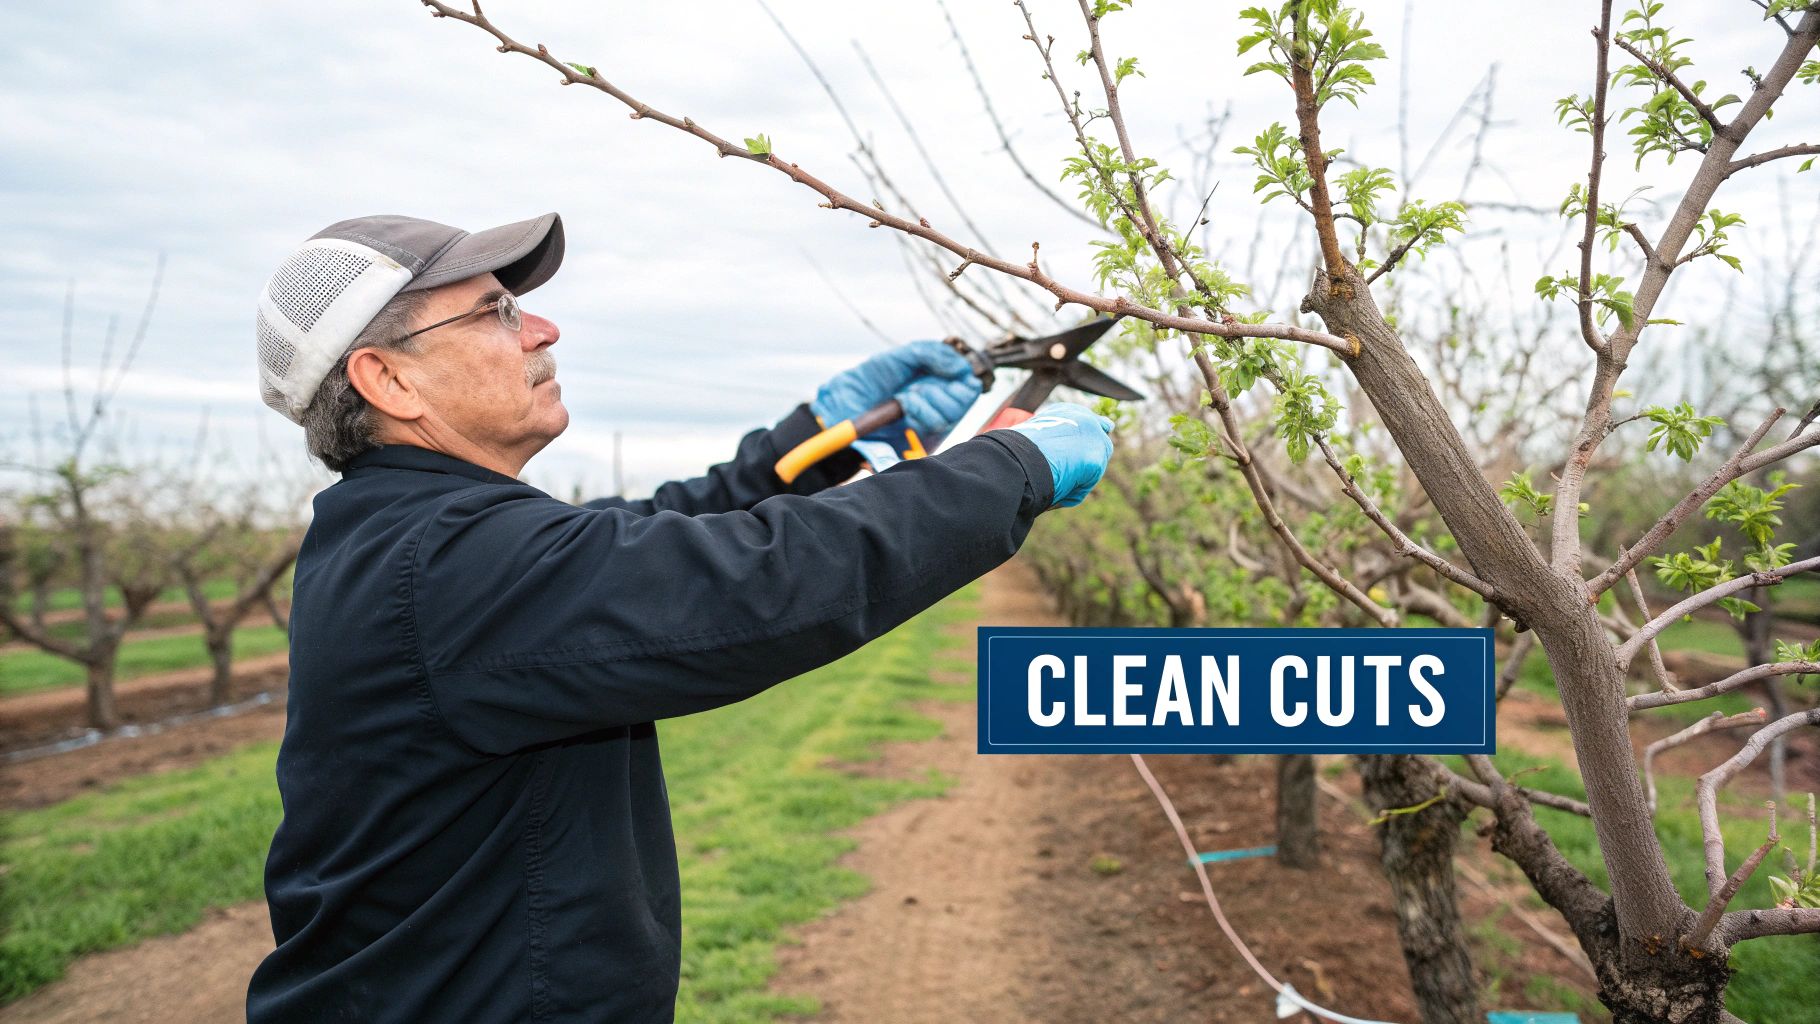
Sharpness is just as important. A sharp blade makes a clean, surgical cut that the tree can heal over quickly. A dull blade tears and crushes the wood, leaving a messy wound that becomes a prime target for pests and diseases.
Having the right gear and keeping it in top condition turns pruning from a chore into a satisfying craft. Of course, if your trees need more than basic pruning or you're dealing with large, hazardous limbs, calling in a professional is always the safest bet. For expert tree maintenance in Perth, contact Swift Trees Perth. Our team has the professional equipment and expertise to keep your trees healthy and looking their best.
How to Shape Your Plum Tree for Maximum Fruit
Alright, this is where the theory ends and the hands-on work begins. With your clean, sharp tools ready and the dormant season here, it's time to make the cuts that will define your plum tree's future. The goal isn't just about randomly removing wood; it's about creating a strong, productive, and beautiful structure.
For most backyard plum varieties in Australia, the 'open vase' or 'open centre' shape is the gold standard. Picture a wine goblet with an empty middle. This structure is brilliant because it lets maximum sunlight and air into every part of the tree — exactly what you need for ripening fruit and keeping fungal diseases away.
Start With The Three Ds
Before you even start thinking about the overall shape, your first task is essential housekeeping. You need to find and remove any wood that's actively harming the tree. Experienced gardeners call this pruning the 'Three Ds'.
It’s a simple, non-negotiable starting point for any pruning session.
Dead Wood: These branches are usually easy to spot. They'll be brittle, often a different colour, and won't have any signs of life (like a green cambium layer if you scratch the bark). They serve no purpose other than potentially harbouring pests or diseases.
Diseased Wood: Look for cankers, discoloured bark, or any strange growths. Cutting this out well below the affected area helps stop the infection from spreading. A crucial tip: always sterilise your tools after every single cut on diseased wood.
Damaged Wood: Branches that are broken, cracked, or have been rubbing against each other and creating wounds need to go. These weak spots are an open invitation for pests and are likely to snap under the weight of a heavy fruit load.
Once you’ve cleared out the Three Ds, you'll have a much clearer picture of the healthy structure you’re working with.
Establishing The Open Vase Shape
With the problem branches gone, you can now focus on creating that ideal open structure. The main principle is to remove any branches growing inwards towards the centre of the tree. You want all your main branches growing outwards, away from the trunk, like spokes on a wheel.
This is also the time to tackle suckers and water sprouts.
Suckers are shoots that sprout from the base of the tree or its rootstock. Water sprouts are those vigorous, arrow-straight shoots that grow vertically from the main branches. Both are parasitic, stealing energy that should be going into fruit, so get rid of them completely.
Understanding Your Cuts
When you're pruning plum trees, not all cuts are created equal. Knowing the difference between a thinning cut and a heading cut is what separates a good prune from a great one. Each serves a very different purpose.
Thinning Cuts
A thinning cut removes an entire branch right back to where it started — either at the main trunk or a larger limb. This is your go-to cut for opening up the canopy.
When to use it: Use thinning cuts to remove inward-growing branches, branches that cross over others, and to reduce general crowding inside the tree.
Real-world example: Imagine two branches growing parallel and too close together, fighting for the same space and light. You’d make a thinning cut to remove the weaker or more poorly placed one, letting the remaining branch thrive.
Heading Cuts
A heading cut is different; it shortens a branch rather than removing it completely. You cut it back to a healthy, outward-facing bud. This kind of cut stimulates new growth from the buds just below where you've snipped.
When to use it: On a young tree, you'll use heading cuts to encourage branching and build its main framework. On an established tree, you might use one to redirect growth outwards or to shorten an overly long, whippy branch.
Real-world example: You’ve got a long, leggy branch reaching for the sky. By making a heading cut back to a bud that's pointing away from the tree's centre, you encourage new growth in that outward direction, helping to build that classic vase shape.
While the specifics can vary between fruit trees, these foundational cuts are a common theme. The approach to structuring apple trees, for instance, shares many of these principles. You can read more about it in our guide on pruning an apple tree in Perth.
Practical Scenarios
Shaping a Young Tree (Years 1-3):The first few years are all about establishing a strong framework of 3 to 5 main branches, spaced evenly around the trunk. After planting, you might cut the main leader back to encourage these primary branches to form. In the following winters, you’ll use thinning cuts to remove competing branches and heading cuts to encourage your chosen scaffold limbs to branch out.
Rejuvenating an Older, Neglected Tree:If you've inherited an overgrown plum tree, resist the urge to fix it all in one go. That can seriously shock the tree. Instead, spread the renovation over two or three winters. Start by removing all the Three Ds. Then, focus on opening up the centre by taking out a few of the largest, most problematic inward-growing limbs in the first year. The next year, you can continue to thin out the canopy and shorten the remaining branches.
Getting the perfect shape takes practice and patience, but by following these principles, you can guide your tree towards a long and fruitful life.
For tricky pruning jobs, especially on large or neglected trees, professional expertise can make a world of difference. If you need a hand shaping your trees for optimal health and a bumper crop, contact Swift Trees Perth for expert tree maintenance and a free, no-obligation quote.
Post-Pruning Care And Common Mistakes To Avoid
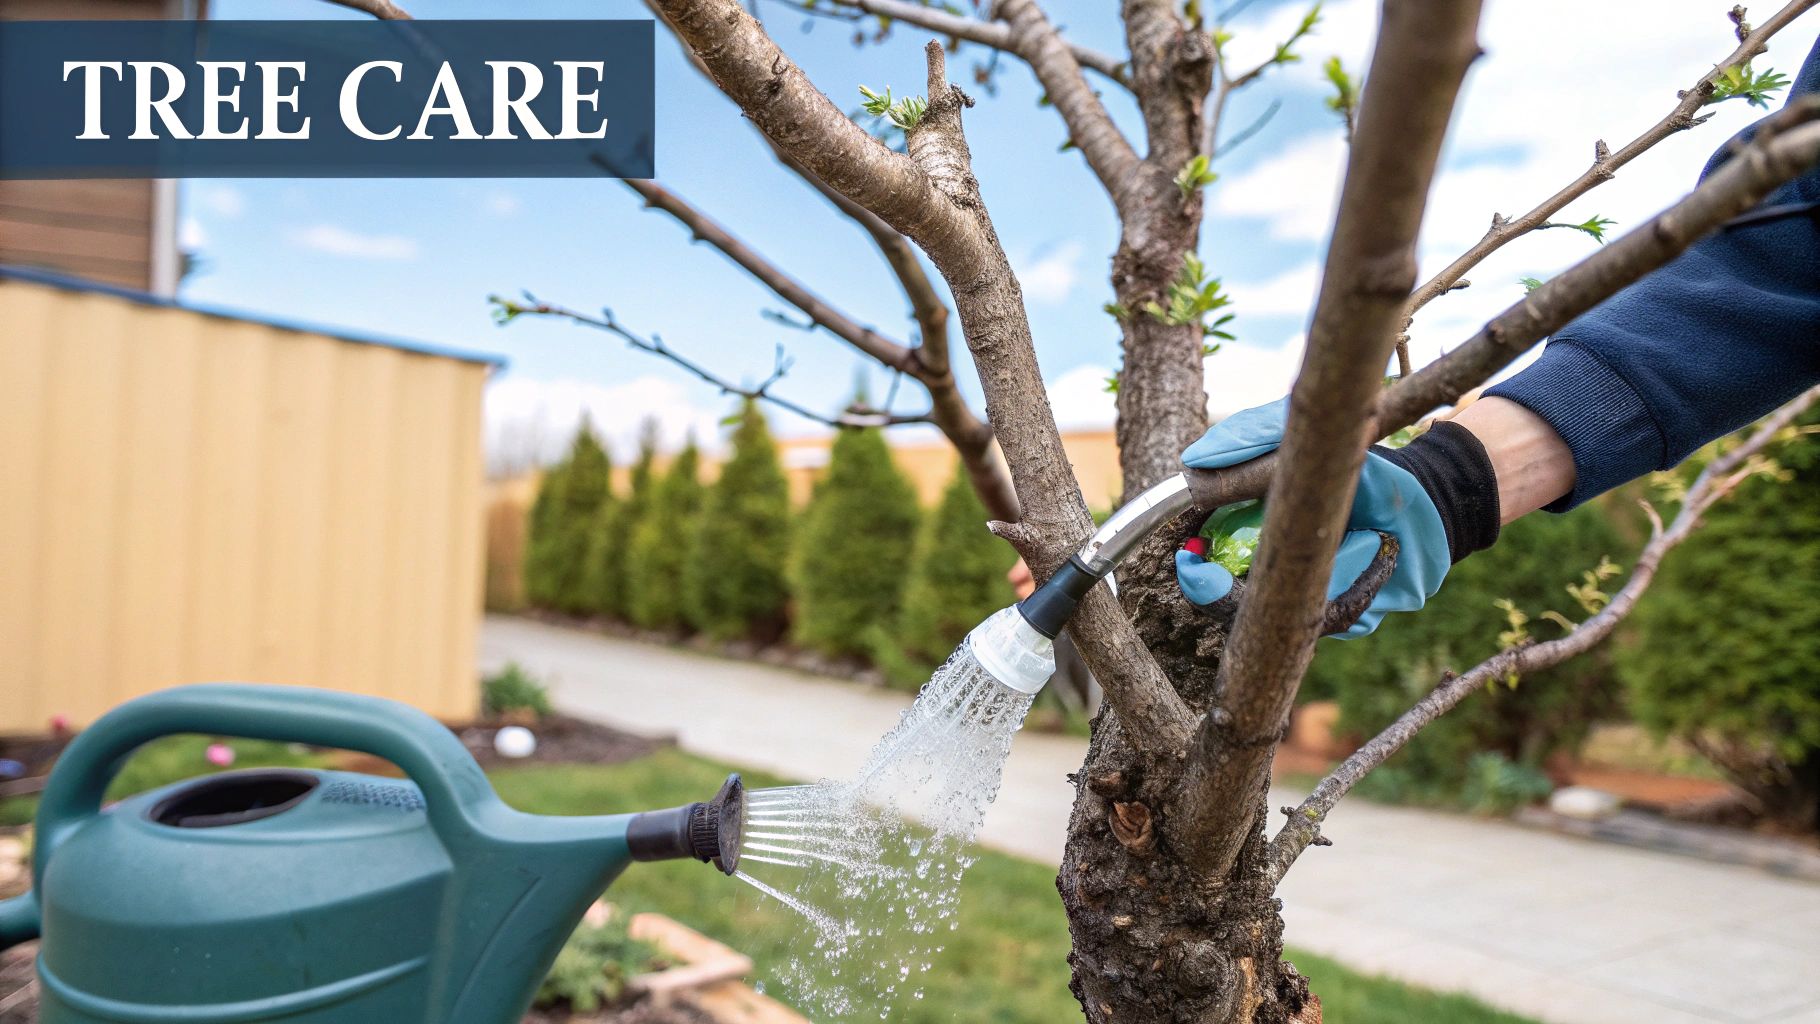
Once you've made the final cut and put your tools away, it's easy to think the job is finished. But what you do right after pruning is just as important as the pruning itself. Good aftercare helps your plum tree bounce back quickly, wards off disease, and prepares it for a stellar growing season.
First things first: clean up properly. Don't leave pruned branches and leaves lying around the base of the tree. This debris can become a breeding ground for fungal spores and pests, creating a disease hotspot right where you don't want it. Bagging and removing all the cuttings is a simple but vital step for the health of your whole garden.
Should You Use Pruning Sealants?
For a long time, the standard advice was to paint pruning wounds with sealants or tars. The idea was to protect the tree from infections, but we now know better.
Modern horticultural science actually advises against this. These sealants can trap moisture against the wood, creating the perfect conditions for rot and disease while slowing down the tree's natural ability to heal. A tree knows how to compartmentalise a wound, forming a protective callus over the cut. A clean, sharp cut is all the protection it needs.
Common (And Costly) Pruning Blunders
Even with the best intentions, a few common mistakes can seriously set your plum tree back. Knowing what to watch for is the key to avoiding long-term damage. Here are some of the most frequent errors I see and how to get it right.
Mistake 1: Getting Too Carried AwayIt’s tempting to try and fix an overgrown tree in one go, but hacking away more than 25-30% of the canopy in a single year can shock the tree. This often triggers a stress response, causing an explosion of weak, vertical water sprouts that won't produce fruit.
The Fix: If you’re dealing with a neglected tree, plan the renovation over two or three years. In the first season, focus on the worst offenders—the dead, damaged, and badly crossing branches. You can continue to refine the shape in the following years.
Mistake 2: Cutting into the Branch CollarThe branch collar is that slightly swollen ring of tissue where a branch meets the trunk or a larger limb. It contains specialised cells that are critical for healing. Cutting flush against the trunk removes this collar, creating a large wound that heals very slowly, if at all.
The Fix: Always make your cut just outside the branch collar, leaving it completely intact. This gives the tree everything it needs to form a neat, protective callus over the wound efficiently.
Pruning is a partnership with your tree. By understanding its natural processes, like how it heals wounds, you can work with it to create a strong, healthy, and productive structure. A precise cut just outside the branch collar is a perfect example of this cooperative approach.
Mistake 3: Using Blunt or Dirty ToolsI can't stress this enough. Dull blades don't cut; they crush and tear wood fibres. This creates ragged wounds that are slow to heal and are wide-open invitations for disease. Likewise, using dirty tools is one of the fastest ways to spread infections like silver leaf disease from one tree to another.
The Fix: Sharpen your tools before you begin and give them a wipe-down with methylated spirits between cuts, especially when moving to a different tree or after cutting out diseased wood. A sharp, clean cut is the kindest cut you can make.
After you've pruned and tidied up, applying a layer of organic mulch around the base of the tree is a brilliant final touch. Mulching helps hold moisture in the soil, keeps weeds down, and adds valuable nutrients as it breaks down. For Perth gardeners, understanding why mulch is so important is a game-changer for a thriving garden.
Avoiding these common pitfalls will give your tree the best chance to recover from its winter haircut and pour its energy into producing a bumper crop of delicious plums.
If you're looking at a complicated pruning job or just want the peace of mind that comes with professional expertise, don't hesitate to get in touch. Contact Swift Trees Perth for all your tree care needs and get a free, honest quote from our experienced team.
Answering Your Plum Tree Pruning Questions
Even with the best guide, you'll always have questions when you're actually standing in front of your plum tree, secateurs in hand. Every tree is unique, and real-world situations rarely fit neatly into a manual. Let's tackle some of the most common questions Australian gardeners have about pruning their plum trees to help you cut with confidence.
How Much Is Too Much To Prune?
This is the number one thing that makes gardeners hesitate, and for good reason. Overdoing it can really set a tree back.
A solid rule of thumb is to never remove more than one-third of the tree's total canopy in a single year. For a healthy, established tree, I'd even suggest aiming closer to 20-25% as a safer bet.
Go too hard, and you'll stress the tree out. It often triggers a survival response, causing an explosion of weak, vertical shoots called water sprouts. These shoots are all leaves, no fruit, and they'll quickly make the canopy even more congested than when you started.
Picture this: You've just moved into a place with a plum tree that hasn't seen a pair of loppers in a decade. It’s a tangled mess. Resist the urge to fix it all in one go.* Year 1: Start with the basics. Get rid of the "Three Ds" (dead, diseased, and damaged wood). Then, take out just one or two of the biggest, most problematic branches that are crowding the centre.* Year 2 & 3: Come back and continue thinning out the canopy and shortening the remaining branches to guide it back to a healthy, open shape.
This patient, multi-year approach lets the tree recover and respond with controlled, healthy growth instead of just panicking.
What If I Accidentally Pruned At The Wrong Time?
It happens to the best of us. Maybe you got a bit too eager in early spring, or a storm broke a branch mid-summer and forced your hand. Don't panic. While the dead of winter is ideal, a single ill-timed prune isn't usually a death sentence for a healthy tree.
Your main job now is damage control. The biggest risk of pruning outside the dormant season is letting nasty diseases like silver leaf get into the open wounds. As soon as you make the cut, make sure your tools are properly sterilised with methylated spirits. Then, just keep a close eye on the tree for any signs of dieback or strange leaf discolouration over the next few weeks.
Do Different Plum Varieties Need Different Pruning?
Yes, they do, to some extent. The core principles of creating an open, sunny structure apply to all plum trees, but the natural growth habits of European and Japanese varieties are quite different.
Japanese Plums (e.g., 'Santa Rosa', 'Mariposa'): These guys are generally more vigorous and love to sprawl. They respond really well to the open vase shape we've talked about, as it helps manage their energetic growth and gets sunlight to all the developing fruit.
European Plums (e.g., 'Victoria', 'President'): These tend to be more upright and compact growers. They are often better suited to a 'central leader' system, where you maintain a single dominant trunk with branches radiating out from it, a bit like a classic Christmas tree shape.
Knowing your variety helps you work with its natural tendencies instead of constantly fighting against them.
Why Is My Plum Tree Not Producing Fruit After Pruning?
This is incredibly frustrating, but there are usually a few common culprits. If you've pruned way too heavily, you may have accidentally snipped off most of the two-year-old wood. That's where plums typically form their fruit-bearing spurs, so the tree will need a season or two to grow new fruiting wood.
The timing could also be the issue. A very late winter prune can sometimes shock the tree into putting all its energy into leafy growth at the expense of flowers and fruit. Always try to get your main structural pruning done and dusted by late August at the latest.
Getting pruning right is critical for fruit production. Australia's plum industry knows this well—states like Western Australia, which contributes 15.9% to the national total, rely on precision pruning for consistent, high-quality yields. This just goes to show how vital good orchard management is, both in commercial settings and your own backyard. You can read more about the scale of Australian plum production to see why it’s taken so seriously.
Pruning plum trees can feel complex, especially when you're dealing with an old, neglected tree or facing a specific challenge. If you're not confident about making the right cuts or just want a professional touch to guarantee the health and productivity of your trees, getting expert help is a smart move.
Your garden is an extension of your home, and your trees are its most valuable assets. Don't leave their health to chance. For all your tree maintenance needs in Perth, from precision pruning to complex removals, trust the experienced team at Swift Trees Perth. We provide safe, efficient, and professional services to keep your trees thriving. Contact us today for a free, no-obligation quote and let us help you achieve the beautiful, bountiful garden you deserve.
Comments